


Configure Windows Firewall to unblock UDP Port 69
Create an Inbound Rule
- Open the Windows Control Panel
- Open Windows Firewall
- Click “Advanced Settings.”
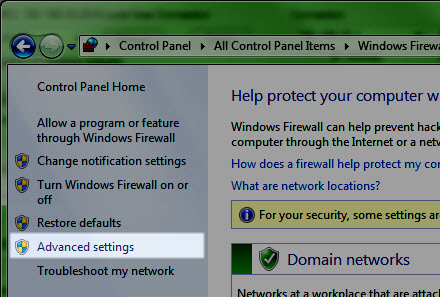 Figure 1: Windows Firewall advanced settings
- On the Advanced Settings screen, select “Inbound Rules.”
 Figure 2: Windows Firewall Inbound Rules
- On the right column of the screen, select “New Rule.” The New Inbound Rule Wizard dialog will open.
- Select the radio selector labeled “Port” to define the Rule Type as applicable to a port. Click Next.
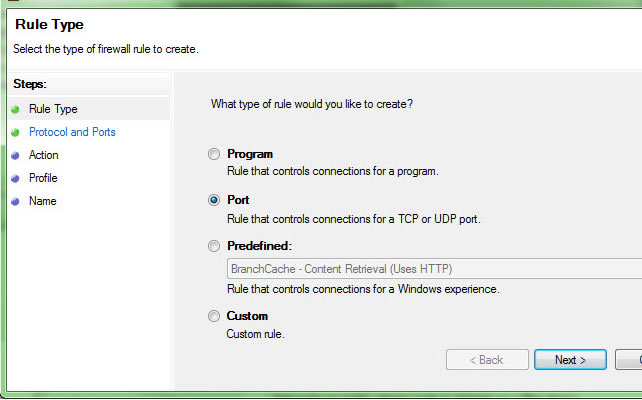 Figure 3: Windows Firewall Inbound Rules – Rule Type
- On the Protocols and Ports dialog, activate the radio selector labeled “UDP”
- Select the option “Specific Local Ports.” In the text field, enter the number “69”. Click Next.
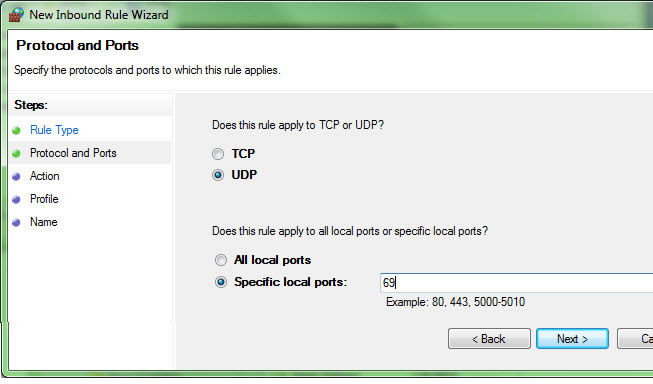 Figure 4: Select UDP Port 69
- On the Action dialog, select the option “Allow the connection” Click Next.
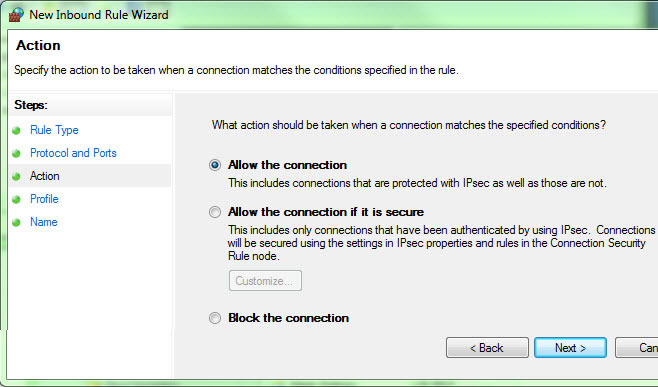 Figure 5: Allow the connection for the new inbound rule
- On the Profile dialog, check the networks to which this rule will apply. Click Next.
 Figure 6: Select applicable profiles
- Name the rule “Novanta IMS Ethernet Upgrade.” Click Finish.
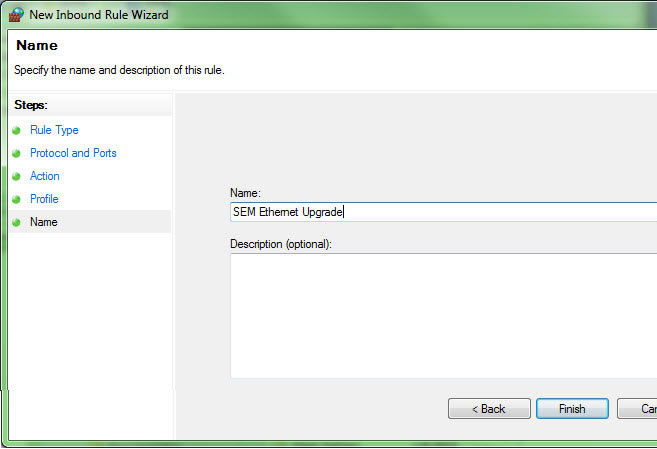 Figure 7: Name inbound rule
- In Windows Firewall Advanced settings screen the new rule will show as active.
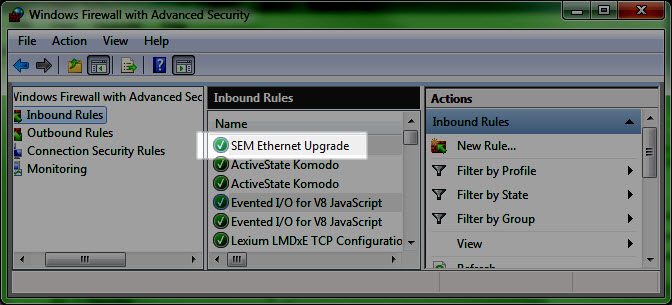 Figure 8: Activate rule
Create an Outbound Rule
- On the Widows Firewall Advanced Settings screen, select Outbound Rules. On the right column Click “New Rule.”
- Repeat the steps for the Outbound Rule Wizard as followed in creating the Inbound Rule, configuring the firewall to allow outbound traffic on UDP Port 69.
- You may now continue with the process of upgrading Ethernet firmware. When complete Novanta IMS recommends that you disable these rules.